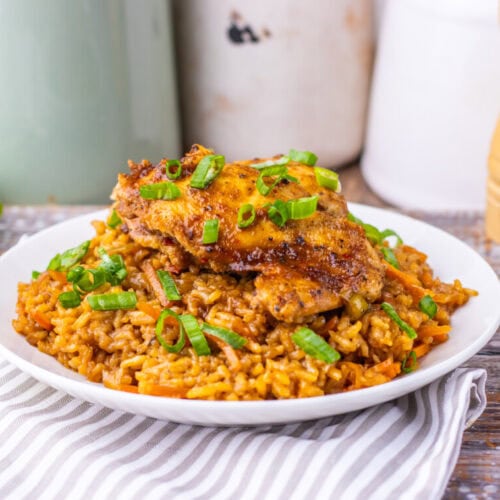
Japanese BBQ Chicken and Rice
This Japanese BBQ Chicken and Rice is an easy one pan dinner made with juicy glazed chicken thighs baked over seasoned rice that soaks up every bit of sweet savory umami flavor. Cozy, simple, and better than takeout.
Print Recipe
Ingredients
- 1 1/2 cup of chicken broth
- 1 cup of Japanese bbq sauce divided
- 2 tbsp soy sauce
- 2 tsp sesame oil
- 2 tsp rice wine vinegar
- 2 tsp garlic powder divided
- 2 tsp onion powder divided
- 2 tsp red pepper flakes divided
- 2 tsp pepper divided
- 1 cup of white rice
- 1/4 cup of the white ends of a green onion chopped (save the green part for topping)
- 1 cup of shredded carrots
- 6 boneless skinless chicken thighs
Instructions
- Step 1: Build the Flavorful Rice Base - Preheat your oven to 375 degrees and set out a 9 by 13 baking dish. In a medium bowl whisk together the chicken broth, half of the Japanese BBQ sauce, soy sauce, sesame oil, rice wine vinegar, half the garlic powder, half the onion powder, half the red pepper flakes, and half the pepper. Give it a good stir until everything looks glossy and blended. This mixture is what gives the rice all that incredible flavor while it bakes.
- Step 2: Layer the Rice and Vegetables - Pour that seasoned broth mixture into the baking dish. Add the white rice, chopped white green onion pieces, and shredded carrots. Stir everything together right in the dish so the rice is coated well. This step matters because you want all those flavors evenly distributed before the chicken goes on top.
- Step 3: Season and Glaze the Chicken - In a separate bowl toss the chicken thighs with the remaining garlic powder, onion powder, red pepper flakes, and pepper. Nestle the chicken pieces right over the rice mixture. Then drizzle the remaining Japanese BBQ sauce over the top and use a spoon or brush to baste each piece well. This is where that sticky glazed finish starts.
- Step 4: Cover and Bake Until Tender - Cover the baking dish tightly with foil. This is important because the rice needs that trapped steam to cook properly. Slide it into the oven and bake for 55 minutes. During that time the rice absorbs all the liquid and the chicken slowly turns tender and juicy.
- Step 5: Broil for Caramelized Finish - Remove the foil and switch the oven to broil. Broil for about 5 minutes, just until the chicken gets glossy and slightly caramelized around the edges. Keep an eye on it because broilers move fast. That little finishing step gives it that irresistible takeout style look and flavor.
- Step 6: Finish and Serve - Scatter the reserved green onion tops over everything before serving. I like to fluff the rice a little around the chicken before plating so every scoop gets some of that sauce soaked rice. It smells unbelievable at this point.
Notes
Substitutions
- Chicken breasts: These can work, though thighs stay juicier during the longer baking time.
- Brown rice: You can use it, but it may need extra liquid and longer cooking time.
- Tamari instead of soy sauce: A great option if you need a gluten free swap.
- Matchstick carrots: These work just as well if that is what you have.
Variations
- Extra spicy version: Add more red pepper flakes or a spoonful of chili crisp for extra heat.
- Veggie loaded version: Stir in peas, edamame, or sliced bell peppers for more color and texture.
- Teriyaki twist: Use part teriyaki sauce with the Japanese BBQ for another delicious flavor spin.
- Sesame topping: Sprinkle toasted sesame seeds over the top before serving for extra crunch.
Tips and Tricks
- Seal the dish well: A tight foil cover is key for properly cooked fluffy rice.
- Use chicken thighs: They stay tender and juicy even during the long bake.
- Adjust the heat: Reduce the pepper flakes if you prefer a milder dish.
- Add extra sauce at the end: A drizzle of extra Japanese BBQ sauce after baking is never a bad idea.
- Watch the broiler carefully: It can caramelize quickly and you do not want it to burn.
Serving Ideas
- Steamed edamame: A simple side that pairs beautifully with the Japanese flavors.
- Cucumber salad: Something cool and crisp balances the rich sticky chicken.
- Roasted broccoli: A hearty vegetable side that works wonderfully here.
- Extra green onions and sesame seeds: These make an easy fresh flavorful topping.
Storage and Make Ahead Tips
- Refrigerate leftovers: Store in an airtight container for up to three days.
- Reheat gently: Add a splash of broth before reheating so the rice stays moist.
- Prep ahead: Assemble the dish earlier and bake when ready for an easy dinner plan.
- Freeze portions: Individual servings can be frozen for future quick meals.
Servings: 6 servings