Pizza Dough
There is something about making pizza dough from scratch that slows a house down in the best possible way. The noise drops a little. The pace eases up. Even the kids seem to wander into the kitchen more quietly, like they know something good is happening. It is just flour and water and yeast on the counter, nothing fancy, but the process feels special. Like you are doing something your future self is going to be really glad you took the time to do.

This is the dough I come back to when the week has been long and the fridge is a little bare. The one I make when I want to feed my people something warm and comforting without pulling out a takeout menu. Sometimes it turns into a classic pepperoni pizza. Other nights it becomes a clean out the fridge situation with leftover veggies and whatever cheese is hanging on. Either way, it always feels like a win.

There is a moment when the yeast hits the warm water and sugar that still feels like a small miracle to me. You stir it, walk away, come back, and there it is all foamy and alive. It feels like the kitchen taking a deep breath. Then comes the flour, the salt, the olive oil, and suddenly you have this shaggy little dough that looks like it might not come together. Give it a few minutes of kneading though, and it smooths out like it just needed a little encouragement. Kind of like most of us, if I am being honest.
This dough has been made on rushed weeknights and slow weekend afternoons. It has been rolled out thin and baked until crisp, and it has been pressed thick and fluffy when the kids wanted big slices they could fold. It has been cooked directly on a hot stone and on an old baking sheet that has seen better days. Every time, it shows up and does what it is supposed to do. That is the kind of recipe I love keeping around.

What Is Pizza Dough?
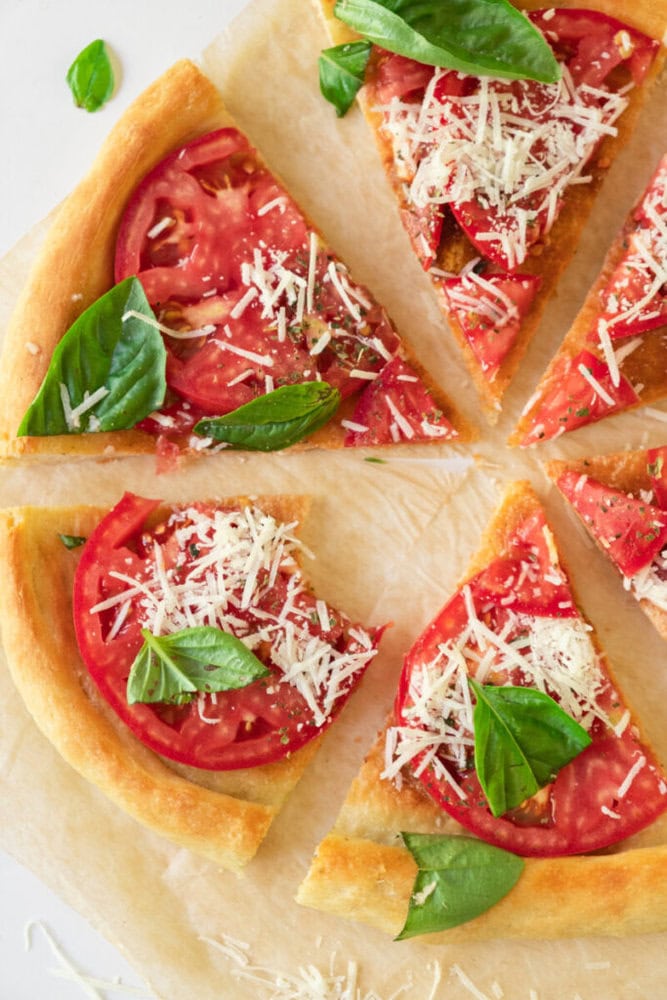
Pizza dough is a simple yeast based dough made from flour, water, yeast, salt, and olive oil that rises and bakes into the foundation of a good homemade pizza. When made at home, it gives you full control over the texture, flavor, and thickness of your crust, whether you like it thin and crisp or soft and chewy.
Why You Will Love This Recipe
- Simple ingredients: Everything you need is likely already sitting in your pantry or fridge, which means pizza night can happen without a grocery run.
- Beginner friendly: The steps are forgiving and easy to follow, even if you have never worked with yeast before.
- Reliable results: This dough rises well, bakes evenly, and gives you a crust that is crisp on the outside and soft inside.
- Family approved: Kids love getting involved with stretching the dough and choosing toppings, and adults love how good it tastes.
- Versatile base: You can use this dough for classic pizzas, flatbread style pies, or even to make cheesy breadsticks.
When to Serve This Recipe
- Weeknight dinners: This is perfect for those nights when you want something homemade but not complicated.
- Family pizza night: Set out toppings and let everyone build their own pizza for a fun and relaxed dinner.
- Weekend cooking projects: Making dough from scratch is a great slow down and enjoy the process kind of activity.
- Casual gatherings: This dough makes enough for sharing and works great for feeding a small crowd.
- Freezer meal prep: Make extra dough balls ahead of time and stash them away for future pizza nights.
Ingredients
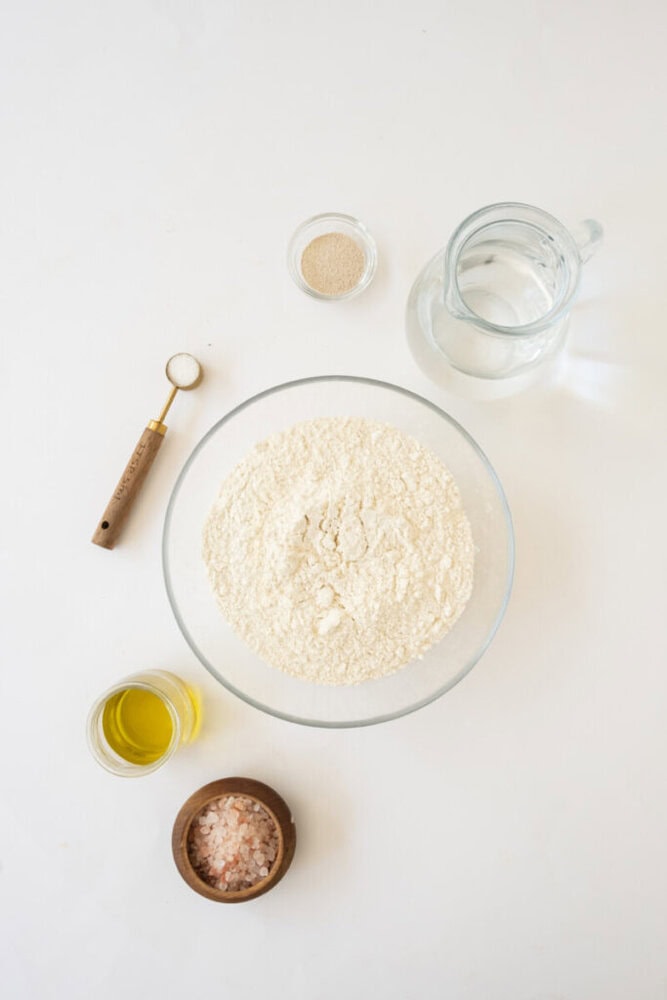
- 3 cups all purpose or bread flour The base of the dough and what gives the crust its structure. Bread flour will give you a slightly chewier bite.
- 1 cup warm water not hot Warm water wakes up the yeast without killing it. Think warm bath temperature.
- 2¼ teaspoons dry yeast This is what gives the dough its rise and airy texture.
- 1 teaspoon sugar or honey A little sweetness feeds the yeast and helps it get foamy and active.
- 1 teaspoon fine salt Salt brings out the flavor of the dough and balances the yeast.
- 2 tablespoons olive oil plus extra for brushing Adds flavor and tenderness to the dough and helps the crust brown beautifully in the oven.
How to Make Pizza Dough
Step 1: Activate the yeast
In a small bowl, combine the warm water, sugar or honey, and dry yeast. Give it a gentle stir and set it aside for about 5 to 10 minutes. You are looking for a foamy, bubbly surface. If nothing happens, your yeast may be inactive and it is best to start over with fresh yeast.
Step 2: Mix the dough
In a large bowl, add the flour and salt. Pour in the yeast mixture and the olive oil. Use a spoon or your hands to mix everything together until a rough, shaggy dough forms. It will look a little messy at first, and that is perfectly fine.
Step 3: Knead the dough
Turn the dough out onto a lightly floured surface. Knead for about 8 to 10 minutes, pushing it away from you, folding it back over itself, and turning it slightly each time. The dough should become smooth and elastic, soft and slightly tacky but not sticky. Add a small sprinkle of flour only if it is sticking to your hands.
Step 4: First rise
Place the dough into a lightly oiled bowl and turn it once so the surface is coated. Cover the bowl with a clean towel and set it in a warm spot in your kitchen. Let it rise for 60 to 90 minutes, or until it has doubled in size. This is a great time to tidy the kitchen or prep toppings.
Step 5: Shape the dough
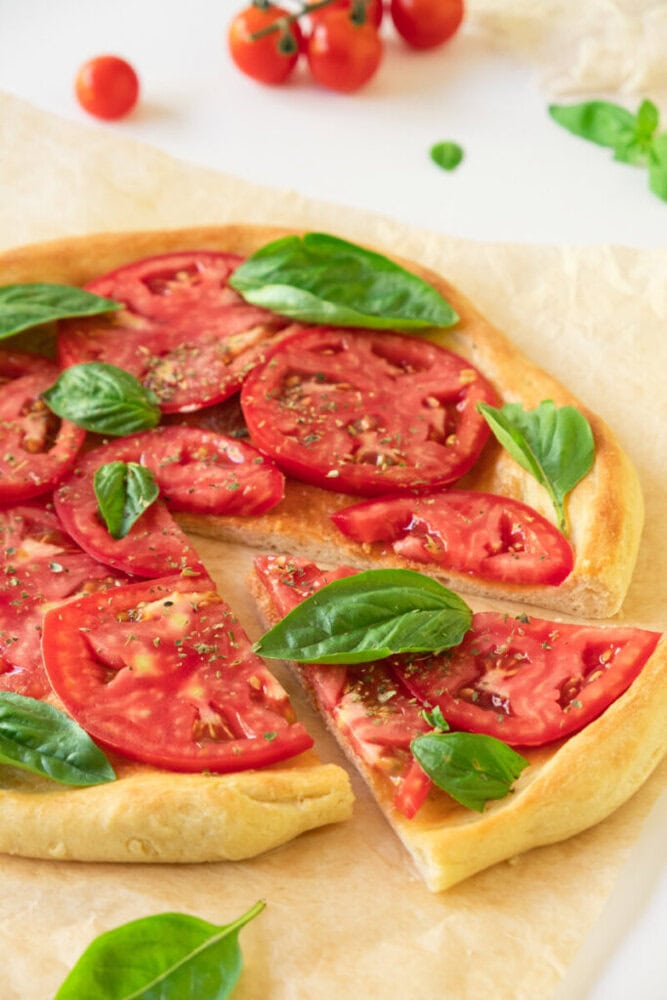
Gently punch down the dough to release excess air. Divide it into two equal balls. Let them rest for about 10 minutes so the gluten relaxes, which makes stretching easier. Stretch or press each ball into a round, leaving the edges slightly thicker for that classic pizza crust rim.
Step 6: Prep and top
Place the shaped dough onto parchment paper or a lightly floured surface. Brush the edges lightly with olive oil to help them turn golden in the oven. Add your sauce and toppings, keeping things balanced so the crust can bake evenly.
Step 7: Bake
Bake in a preheated oven at 230 to 250°C for 10 to 14 minutes, or until the edges are golden and the bottom is crisp. If you have a pizza stone, use it for even better results. Let the pizza cool for a minute or two before slicing.
Substitutions
- Whole wheat flour: Swap in half whole wheat flour for a nuttier flavor and slightly heartier crust.
- Instant yeast: You can use instant yeast in place of active dry yeast and skip the blooming step if needed.
- Maple syrup: Use maple syrup instead of sugar or honey for a subtle twist in flavor.
- Avocado oil: This can replace olive oil if that is what you have on hand.
- Gluten free flour blend: Use a trusted gluten free pizza flour blend and follow the package hydration tips.
Variations
- Thin crust pizza: Roll the dough thinner and bake a little longer for a crispier base.
- Thick crust pizza: Press the dough thicker and let it rest longer before topping for a fluffier bite.
- Garlic crust: Mix a little garlic powder into the dough for extra flavor.
- Herb dough: Add dried oregano or basil to the flour for an herby aroma.
- Cheesy edges: Sprinkle a little grated cheese around the rim before baking for a golden cheesy crust.
Tips and Tricks
- Warm your bowl: A slightly warm bowl helps the dough rise more evenly in cooler kitchens.
- Do not rush the rise: Giving the dough time to double in size improves both texture and flavor.
- Use a hot oven: The hotter the oven, the better your crust will bake and puff.
- Stretch by hand: Pressing and stretching instead of rolling helps keep air bubbles in the dough.
- Less is more with toppings: Too many toppings can weigh the dough down and make it soggy.
FAQs
Can I make this dough ahead of time?
Yes. After the first rise, you can refrigerate the dough for up to 24 hours. Let it come to room temperature before shaping and baking.
Can I freeze pizza dough?
Absolutely. Divide the dough into balls, coat lightly with oil, wrap well, and freeze for up to three months. Thaw overnight in the fridge before using.
Why did my dough not rise?
This usually means the yeast was inactive or the water was too hot or too cold. Always check for foam during activation.
Do I need a pizza stone?
No, but it helps. A regular baking sheet works just fine if that is what you have.
Can I double this recipe?
Yes. This recipe doubles easily if you are feeding a crowd or want to stock the freezer.
Serving Ideas
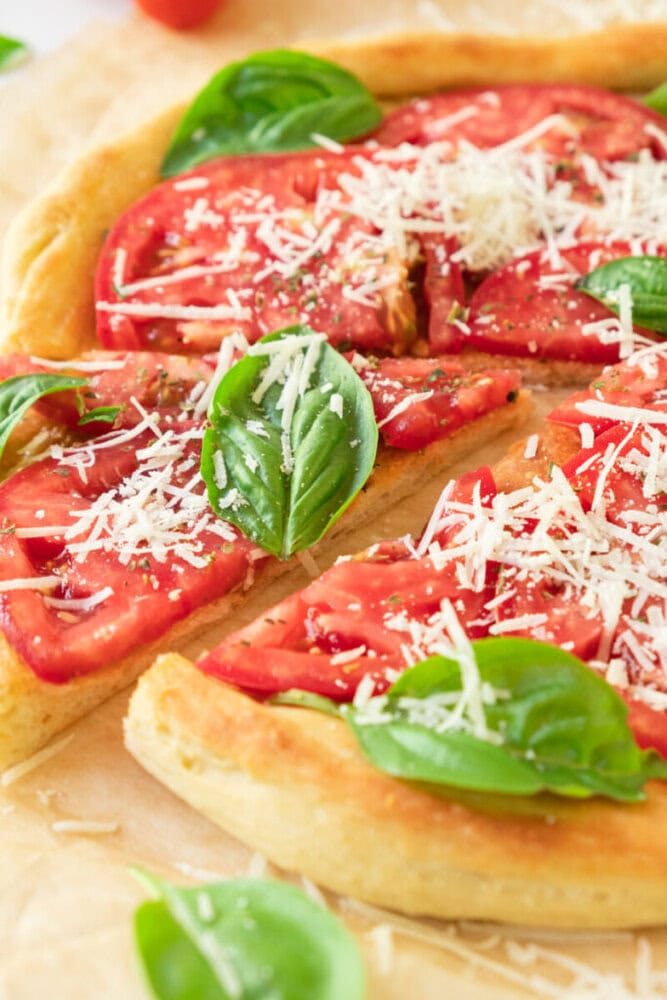
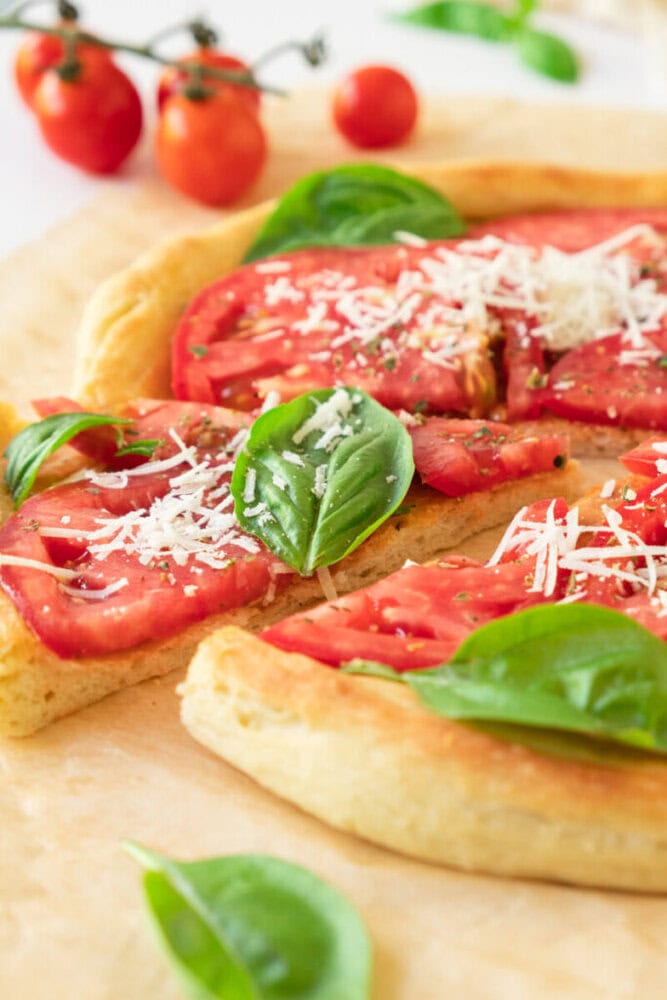
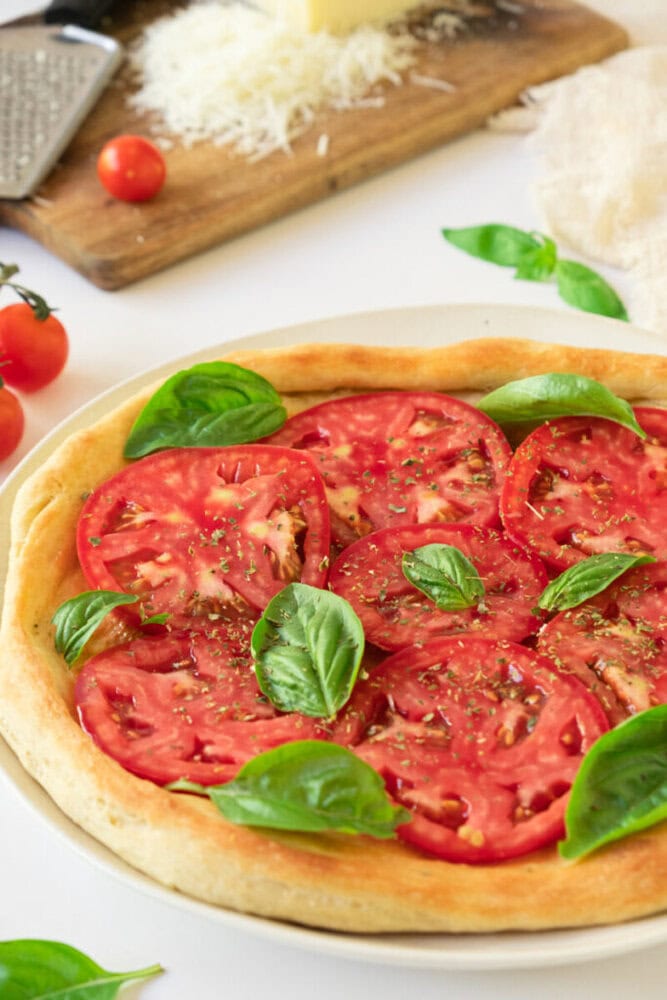
- Classic margherita pizza: Top with tomato sauce, fresh mozzarella, and basil for a simple favorite.
- Pepperoni and cheese: A crowd pleaser that never fails.
- Veggie loaded pizza: Pile on mushrooms, peppers, onions, and olives for a colorful meal.
- White pizza: Skip the red sauce and use olive oil, garlic, and ricotta.
- Garlic breadsticks: Shape the dough into strips, brush with butter, and bake until golden.
Storage and Make Ahead Tips
- Refrigerate dough: Store covered dough in the fridge for up to 24 hours after the first rise.
- Freeze extra portions: Freeze individual dough balls for quick future meals.
- Store baked crusts: Par bake crusts and freeze them for ultra fast pizza nights later.
- Keep dough covered: Always cover resting dough to prevent it from drying out.
- Label freezer bags: Add the date so you know when to use your frozen dough.
Pizza Dough
Ingredients
- 3 cups all-purpose or bread flour
- 1 cup warm water not hot
- 2¼ tsp 1 packet dry yeast
- 1 tsp sugar or honey
- 1 tsp fine salt
- 2 tbsp olive oil + extra for brushing
Instructions
- Step 1: Activate the yeast – In a small bowl, combine the warm water, sugar or honey, and dry yeast. Give it a gentle stir and set it aside for about 5 to 10 minutes. You are looking for a foamy, bubbly surface. If nothing happens, your yeast may be inactive and it is best to start over with fresh yeast.
- Step 2: Mix the dough – In a large bowl, add the flour and salt. Pour in the yeast mixture and the olive oil. Use a spoon or your hands to mix everything together until a rough, shaggy dough forms. It will look a little messy at first, and that is perfectly fine.
- Step 3: Knead the dough – Turn the dough out onto a lightly floured surface. Knead for about 8 to 10 minutes, pushing it away from you, folding it back over itself, and turning it slightly each time. The dough should become smooth and elastic, soft and slightly tacky but not sticky. Add a small sprinkle of flour only if it is sticking to your hands.
- Step 4: First rise – Place the dough into a lightly oiled bowl and turn it once so the surface is coated. Cover the bowl with a clean towel and set it in a warm spot in your kitchen. Let it rise for 60 to 90 minutes, or until it has doubled in size. This is a great time to tidy the kitchen or prep toppings.
- Step 5: Shape the dough – Gently punch down the dough to release excess air. Divide it into two equal balls. Let them rest for about 10 minutes so the gluten relaxes, which makes stretching easier. Stretch or press each ball into a round, leaving the edges slightly thicker for that classic pizza crust rim.
- Step 6: Prep and top – Place the shaped dough onto parchment paper or a lightly floured surface. Brush the edges lightly with olive oil to help them turn golden in the oven. Add your sauce and toppings, keeping things balanced so the crust can bake evenly.
- Step 7: Bake – Bake in a preheated oven at 230 to 250°C for 10 to 14 minutes, or until the edges are golden and the bottom is crisp. If you have a pizza stone, use it for even better results. Let the pizza cool for a minute or two before slicing.
Notes
Substitutions
- Whole wheat flour: Swap in half whole wheat flour for a nuttier flavor and slightly heartier crust.
- Instant yeast: You can use instant yeast in place of active dry yeast and skip the blooming step if needed.
- Maple syrup: Use maple syrup instead of sugar or honey for a subtle twist in flavor.
- Avocado oil: This can replace olive oil if that is what you have on hand.
- Gluten free flour blend: Use a trusted gluten free pizza flour blend and follow the package hydration tips.
Variations
- Thin crust pizza: Roll the dough thinner and bake a little longer for a crispier base.
- Thick crust pizza: Press the dough thicker and let it rest longer before topping for a fluffier bite.
- Garlic crust: Mix a little garlic powder into the dough for extra flavor.
- Herb dough: Add dried oregano or basil to the flour for an herby aroma.
- Cheesy edges: Sprinkle a little grated cheese around the rim before baking for a golden cheesy crust.
Tips and Tricks
- Warm your bowl: A slightly warm bowl helps the dough rise more evenly in cooler kitchens.
- Do not rush the rise: Giving the dough time to double in size improves both texture and flavor.
- Use a hot oven: The hotter the oven, the better your crust will bake and puff.
- Stretch by hand: Pressing and stretching instead of rolling helps keep air bubbles in the dough.
- Less is more with toppings: Too many toppings can weigh the dough down and make it soggy.
Serving Ideas
- Classic margherita pizza: Top with tomato sauce, fresh mozzarella, and basil for a simple favorite.
- Pepperoni and cheese: A crowd pleaser that never fails.
- Veggie loaded pizza: Pile on mushrooms, peppers, onions, and olives for a colorful meal.
- White pizza: Skip the red sauce and use olive oil, garlic, and ricotta.
- Garlic breadsticks: Shape the dough into strips, brush with butter, and bake until golden.
Storage and Make Ahead Tips
- Refrigerate dough: Store covered dough in the fridge for up to 24 hours after the first rise.
- Freeze extra portions: Freeze individual dough balls for quick future meals.
- Store baked crusts: Par bake crusts and freeze them for ultra fast pizza nights later.
- Keep dough covered: Always cover resting dough to prevent it from drying out.
- Label freezer bags: Add the date so you know when to use your frozen dough.
Final Thoughts
There is a certain pride that comes from pulling a homemade pizza out of the oven. The kind of pride that makes you stand there for a second, hands on your hips, just admiring it. This dough is not complicated or fussy, but it delivers every time. It turns an ordinary evening into something a little more special, even if the toppings are simple and the table is cluttered with homework and mail.
If you are new to working with yeast, take your time and trust the process. If you have made dough before, you will appreciate how easy and reliable this one is. Either way, this is the kind of recipe that grows with you. The more you make it, the more it starts to feel like yours. And that is the best kind of kitchen recipe to have.


